Mastering Endodontic Skills: A Beginner’s Guide to Using Apex Locators and Endo Motors
by GreenApple September 19, 2025 · Health
Root canal therapy is a critical aspect of dental practice, requiring precision, patience, and a deep understanding of endodontic techniques. For students embarking on this journey, practicing on model teeth is an invaluable step in honing these skills. This tutorial will guide you through using an apex locator and an endo motor—two essential tools that enhance the accuracy and efficiency of root canal treatments.
Understanding the Tools
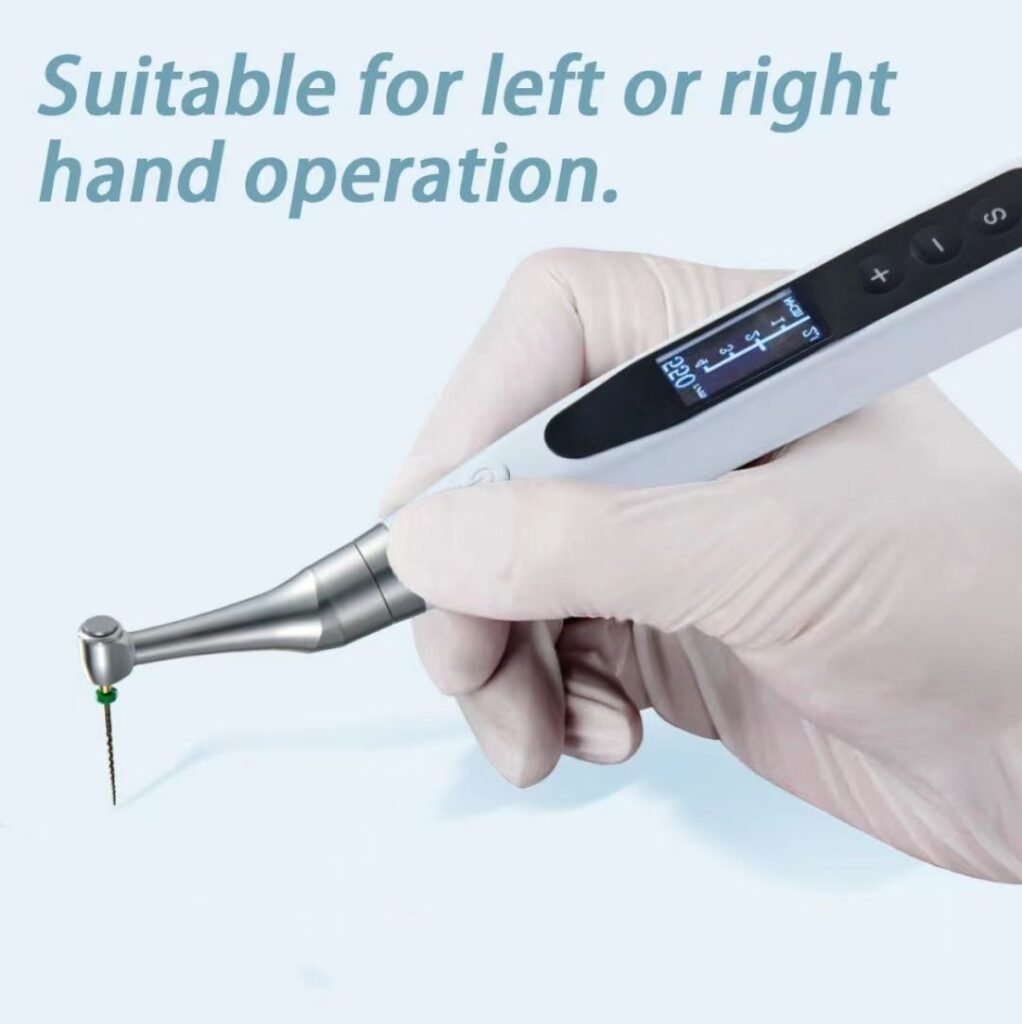
Apex Locator: This electronic device is designed to pinpoint the apical foramen, the tip of the root canal. Accurate determination of the root canal’s length is crucial for effective cleaning and filling, ensuring the procedure’s success.
Endo Motor: This device provides controlled rotational force to endodontic files, facilitating the cleaning and shaping of root canals. It can be programmed to operate at specific speeds and torques, which is vital for preventing instrument separation and maintaining the canal’s integrity.
Step-by-Step Practice
Determining Working Length with an Apex Locator
Consider a tooth model with a complex, curved root canal—a common challenge in endodontics. Here’s how to use the apex locator effectively:
- Initial Setup: Connect the apex locator to the tooth model according to the manufacturer’s instructions. Ensure all connections are secure to avoid any interference with the device’s readings.
- Measurement: Insert the endodontic file into the root canal until it reaches the apical foramen. The apex locator will indicate when the file has reached the correct depth, providing a precise measurement of the working length. This method is more accurate than relying solely on radiographs, which can be less precise, especially in complex canal configurations.
Cleaning and Shaping with an Endo Motor
Once the working length is established, the next step is to clean and shape the root canal using the endo motor:
- Selecting the Right Program: Choose a program on the endo motor that suits the stage of treatment—whether it’s initial canal exploration, cleaning, or shaping. Each program is set to optimal speed and torque levels for that specific task.
- Operating the Motor: Attach the appropriate endodontic file to the endo motor and gently insert it into the root canal. The motor’s controlled rotation will efficiently remove debris and shape the canal. The torque control feature prevents over-instrumentation, reducing the risk of canal transportation or file separation.
Endo motor image reference:https://www.dentallaboratorio.com/product/endodontist-surgical-tools/
Benefits of Using These Tools
Integrating an apex locator and an endo motor into your practice offers significant advantages:
- Increased Accuracy: Precise measurements of the working length ensure that the root canal is treated to the exact specifications needed.
- Improved Efficiency: The endo motor accelerates the cleaning and shaping process with consistent rotational force, thereby reducing overall treatment time.
- Better Control: Torque control in the endo motor helps maintain the canal’s original shape, leading to safer and more predictable outcomes.
- Reduced Operator Fatigue: These tools make the procedure less physically demanding, allowing you to focus more on technique and precision.
Real-World Example
Imagine a scenario where a student is tasked with performing a simulated root canal on a tooth model with a severely curved canal. By following the steps outlined above—using the apex locator to determine the working length and the endo motor to clean and shape the canal—the student successfully completes the procedure without complications. This hands-on experience is invaluable, building confidence and refining skills before treating actual patients.
By mastering the use of an apex locator and an endo motor, you’ll be well-equipped to tackle the challenges of endodontic therapy with precision and confidence. Happy practicing!